
Knocking out custom designs on shirts isn’t rocket science, but it can get tricky. After decades in the business, I’ve tried nearly every approach under the sun.
A few methods thrive because they’re old reliables, while others rely on cutting-edge technology, like AI-first mobile apps that streamline the design process.
A few methods thrive because they’re old reliables, while others rely on cutting-edge technology. Ready for a rundown of eight major options? Time to jump straight in.
1. Screen Printing
Screen printing is the granddaddy of them all. It’s been around forever and refuses to lose relevance. A stencil (often called a screen) is created for every color in a design, and ink is pushed through that mesh onto the shirt. Simple concept, but it can produce shockingly vibrant results.
No one denies it can be a real hassle setting it all up. Creating multiple screens for several colors is time-consuming, so it generally makes sense for bulk orders.
Many small runs won’t justify the effort or cost. On the bright side, the ink sinks nicely into the fabric, and the designs can last for years without peeling or cracking.
It’s also cost-effective once everything is ready to roll. One cautionary note: if a design is highly detailed with loads of colors, it might turn into a nightmare. Sometimes fewer colors work best with an old-school approach like this.
Those who have dabbled in it know the final product is durable. Large corporate events and apparel brands often pick this method because it churns out consistent quality without sending budgets spiraling. Just be prepared for a bit of mess and a learning curve if doing it at home.
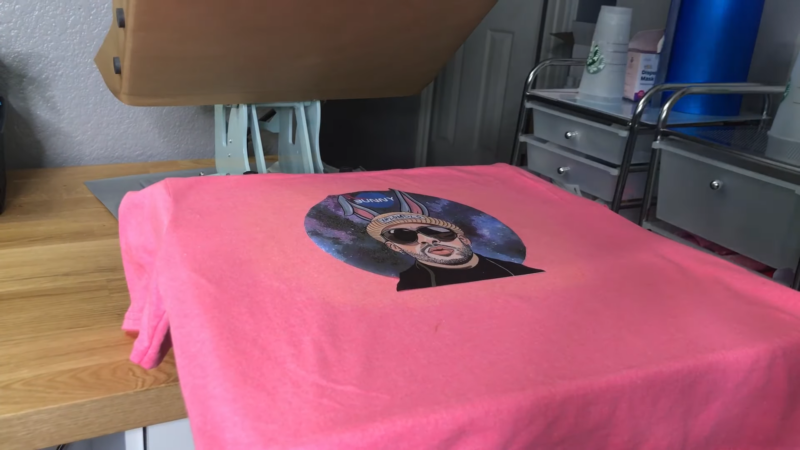
2. Direct-to-Garment (DTG) Printing
DTG is that shiny newcomer who showed up to the party looking fancy. It uses a specialized inkjet printer to apply designs directly onto a shirt. No screens, no fuss, just a printer spitting out detailed, photorealistic images.
Folks love it for designs with intricate details. Gradients, photoreal images, and a rainbow of colors look great in a single pass. There’s one snag: it generally works best on cotton garments, and the ink may fade faster than a well-done screen print.
Another factor is cost. Machines for DTG can be expensive, and so can the ink. That means smaller producers might charge more to justify overhead.
It’s also not a champion in terms of speed when dealing with huge orders. However, it remains a top choice for print-on-demand setups or those who crave the ability to pop out a single shirt as easily as a hundred.
The lack of complicated prep is a definite selling point. Plus, it can handle design changes with ease, so every shirt can feature a different masterpiece if desired.
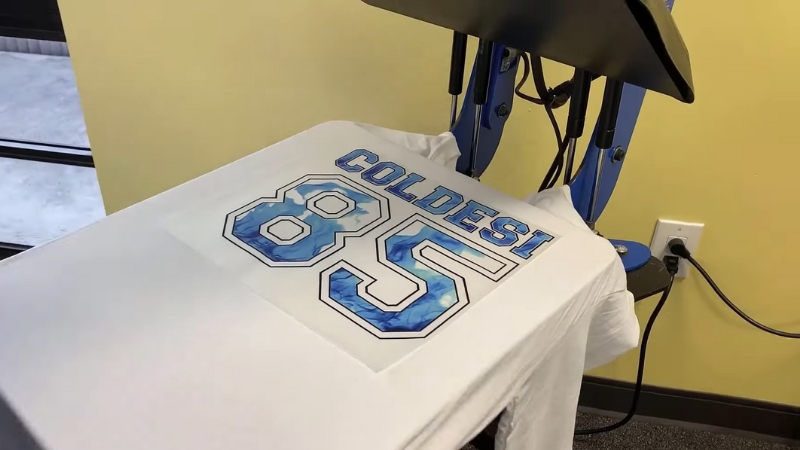
3. Heat Transfer Vinyl (HTV) Printing
HTV is the ultimate solution for personalizing a couple of shirts or numbering sports jerseys. For instance, if you’re looking to customize a Softball Jersey, HTV allows you to add unique names and numbers with ease.
Sheets of vinyl are cut into shapes or text and then pressed onto the shirt with a heat press. It’s accessible, even for amateurs who own a small vinyl cutter and a basic press.
There are a few finishes to pick from, such as matte, glossy, glitter, and more. In other words, it can add a bit of pizzazz that standard inks might not deliver.
That said, large or highly detailed designs can be a pain to weed (removing excess vinyl from the cut sheet). It’s tough on the eyes, tough on the patience.
Vinyl can sit heavily on the fabric, which might irritate some folks. It doesn’t breathe as well as screen ink, so big patches can feel stiff.
However, it’s a fantastic option for short runs, name personalization, and designs that only need a few colors. No complicated setup, no big mess, and minimal frustration—unless there’s a lot of weeding involved.
4. Dye Sublimation Printing
Dye sublimation is a science experiment that nobody believes will work until they see it in action. Heat is used to transform ink into a gas, which then bonds directly with polyester fibers. The result? Colorful prints that won’t crack or peel, because the ink effectively becomes part of the fabric.
It’s a hot pick for all-over prints, especially on lighter-colored, synthetic fabrics. Designers who love bright, eye-catching artwork often pick sublimation for jerseys, leggings, and polyester T-shirts.
Expect a permanent finish that sticks around as long as the garment does. One drawback is that cotton isn’t compatible with this technique. Also, the best results typically come from white or light-colored fabrics. Dark items won’t let the colors pop in the same way.
From a cost standpoint, it’s reasonable for short runs but can get pricey for large-scale production if the setup isn’t streamlined.
Still, there’s a reason it has a cult following among sports teams and fashion-forward brands. Colors remain impressive, and there’s basically no feel on the garment—it’s just dyed in.
5. Heat Transfer Printing
View this post on Instagram
Heat transfer involves printing an image onto a special transfer paper and then pressing it onto a shirt. It’s often used for full-color designs or photographic images. A normal inkjet or laser printer can print the design (though special inks sometimes come into play), and then heat does the rest.
There’s a low barrier to entry and it’s excellent for short runs. Plus, a design can be tested on paper first without losing a fortune. However, it’s not the toughest method around.
Heavy washing may cause fading or cracking in certain conditions. Also, the printed areas can feel a bit thick, especially if the design is large.
Small businesses often adopt this approach for custom gifts or one-off shirts. Hobbyists appreciate the simplicity, as it’s easier to set up than screen printing and can produce bright, multi-colored designs on demand. Just don’t expect bulletproof durability.
6. Plastisol Transfers
Plastisol transfers take some elements of screen printing and mash them together with heat transfer convenience. Designs are screen printed onto a transfer paper using plastisol ink. That print is then pressed onto the garment with heat.
Think of it as a middle-ground technique that combines high durability with the flexibility of producing smaller batches over time.
It’s handy for those who want to stock pre-printed transfers. Once an order comes in, slap a design onto a shirt in a matter of seconds. The result often feels softer than basic heat transfer paper, and the colors can hold up well through washes.
Nonetheless, there’s a bit of a learning curve in perfecting the heat press settings: time, temperature, and pressure. Screw up any one of those variables, and it might peel or not bond correctly.
Since the design is initially created via screen printing, the same color limitations apply. Complex photo prints might not be the best match. But for mid-level detail and moderate volumes, it’s pretty convenient.
7. Airbrushing
@dale_the_airbrush_guy Airbrush Graffiti t shirt design step by step #airbrush #graffiti #graffitiart #airbrushart #lettering #calligraphy #art #fyp ♬ The Banjo Beat, Pt. 1 – Ricky Desktop
Airbrushing is artistic freedom unleashed. It’s done by spraying ink or dye onto the garment using an airbrush tool. Expect freeform creativity, custom shading, and the ability to produce one-of-a-kind works of art that scream personality.
An old friend of mine made a fortune doing custom airbrushed tees at beachside stands. Tourists couldn’t resist the novelty of seeing a shirt painted right in front of them. On the flip side, it’s not the most durable route.
The design can fade and crack faster than more robust methods. Also, skilled airbrush artists are not lurking around every corner. It takes real talent to pull off a polished final piece.
That said, there’s a certain charm in having something truly handcrafted. The limited durability might even add to its mystique. Some see the gradual fade as an artistic feature, giving the shirt an evolving look over time. For a few truly standout items, it’s worth the trade-off.
8. Discharge Printing
Discharge printing can be surprising the first time you see it. A water-based ink strips away the fabric dye, leaving a soft and natural color behind. Another pigment can be added in the process, allowing for a new hue in the space where the old dye was removed.
Dark, 100% cotton shirts are prime targets for discharge. The effect can create a vintage or distressed look without using harsh chemicals that sit on the surface. Once the process is done, the print feels like part of the shirt, without extra layers or a plastic-like finish.
Caution is in order, though. It’s unpredictable on certain garments. Sometimes the fabric doesn’t discharge evenly, leading to unexpected hues.
Those who love the worn or weathered aesthetic adore it, while others might be disappointed if a design doesn’t show up quite as planned. It’s a gamble—sometimes an awesome gamble, but a gamble nonetheless.
Selecting the Right Approach
Each method has strong points and weak spots. Plenty of factors could sway the decision, from the color count to the type of shirt. Consider the following:
- Design Complexity: Intricate artwork with numerous colors might be better with DTG or sublimation. Simpler logos can be done with screen printing or HTV.
- Order Size: Screen printing shines when producing hundreds or thousands. DTG, HTV, and heat transfer methods make more sense for short runs.
- Fabric Type: Cotton is a good friend to screen printing and DTG, while synthetic fibers work well with dye sublimation. HTV can land on almost anything, but it might feel thick on delicate fabrics.
- Durability: Sublimation and screen printing often outlast the shirt itself. Heat transfer paper or airbrushing might fade or peel faster.
A big corporate order for a sports event? Screen printing or plastisol transfers likely keep you sane. A single creative design for an online shop? DTG might be the hero.
Need names on baseball jerseys? HTV or plastisol transfers to the rescue. There’s no one-size-fits-all answer.
Summary
There’s no magical solution that covers every scenario. Each method shines in specific situations and might fizzle in others. After many years in the print industry, that’s the one solid lesson that’s remained true: it’s all about matching the right tool to the project.
Make sure your photos are high-resolution and properly formatted before printing to avoid any unpleasant surprises.
Pick carefully, keep realistic expectations about cost, color, and durability, and the odds of nailing a perfect print improve significantly.
Good luck stamping your mark on the next shirt. May the results make you and your customers grin from ear to ear.